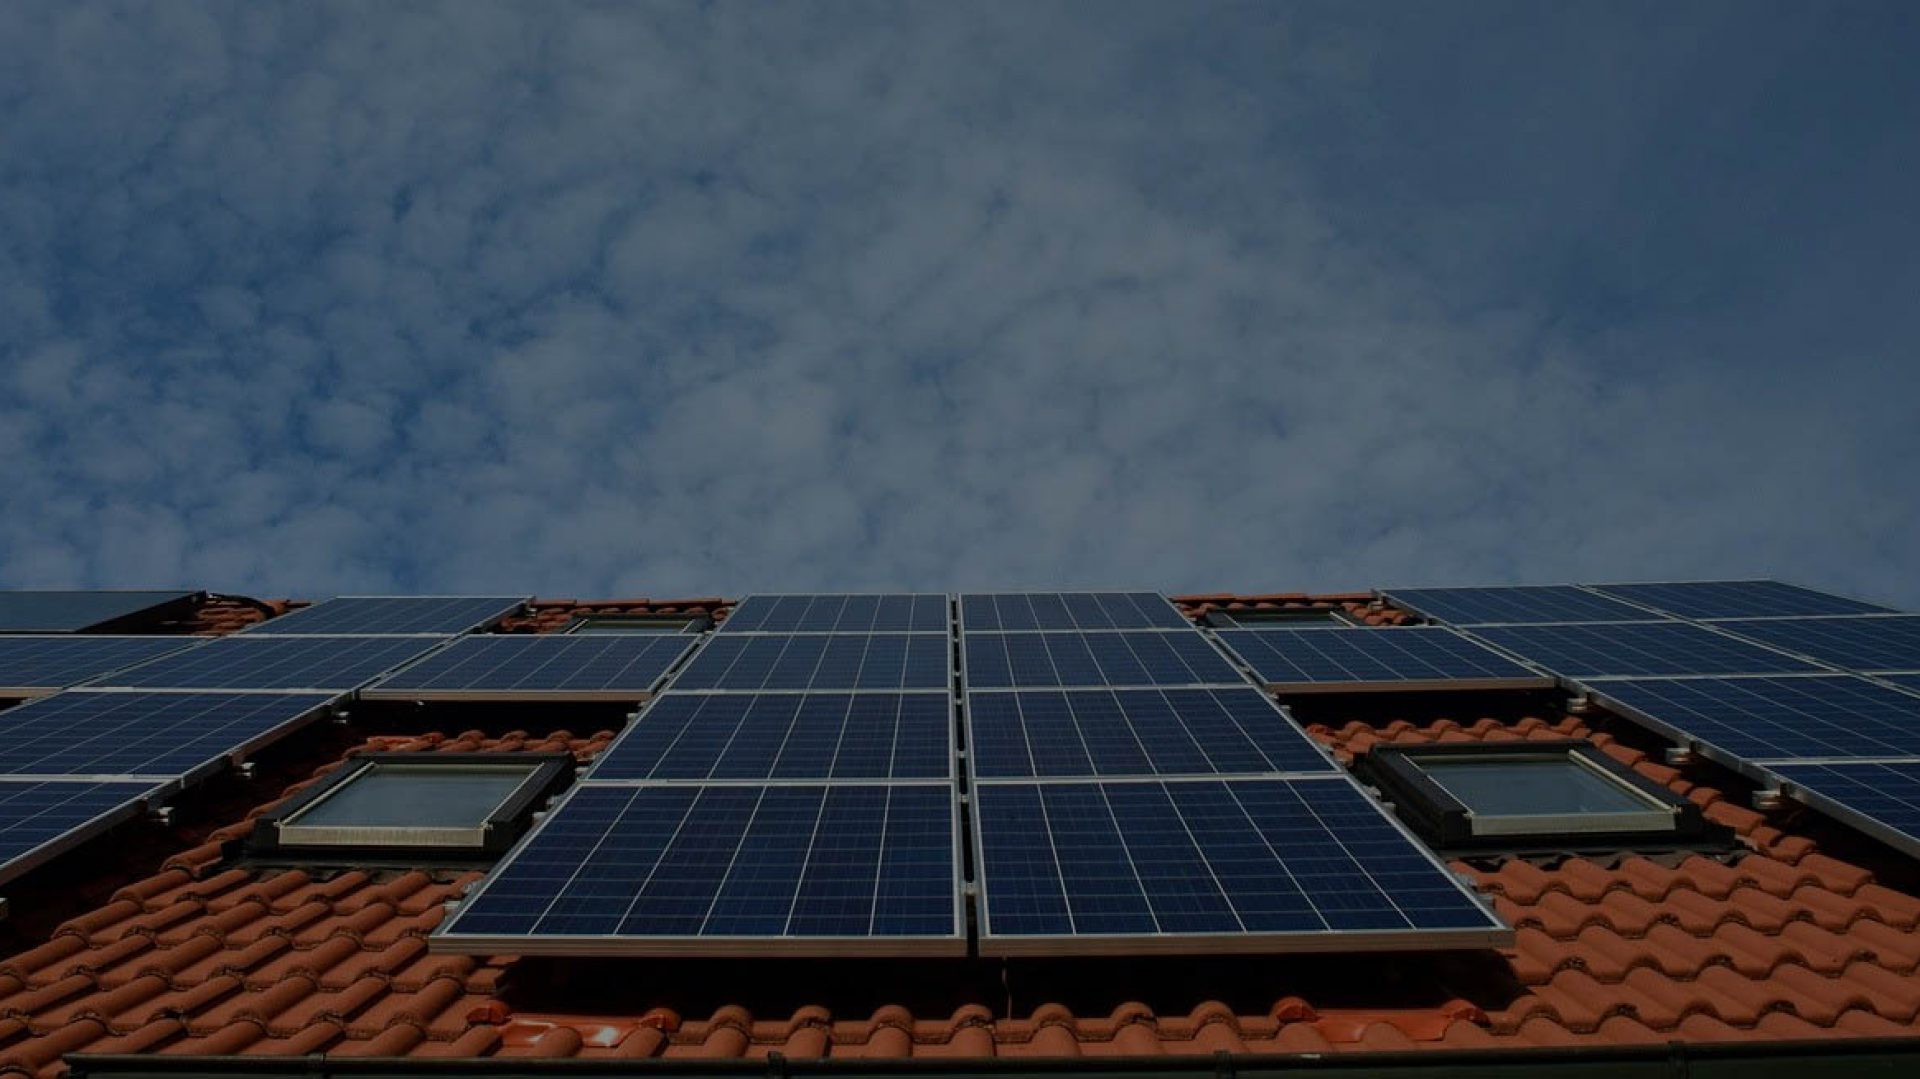
Installing solar panels on your home is a multi-day project requiring careful planning, proper permits, and electrical expertise. Most residential systems take one to three days to physically install once permits are approved, but the complete process from design to final inspection typically spans several weeks. While some aspects of solar installation can be tackled by experienced DIYers who understand electrical systems and local building codes, most homeowners benefit from professional installation to ensure safety, warranty coverage, and optimal system performance.
The decision to go solar represents both an environmental commitment and a significant financial investment. Understanding each phase of the installation process helps you make informed choices, whether you’re planning a DIY project or simply want to know what your contractor is doing on your roof. Sarah Chen, a homeowner in Boulder, Colorado, spent months researching before deciding to install her own ground-mount system in 2025. “I have electrical experience and felt comfortable with the mechanical aspects,” she explains. “But I still hired a licensed electrician for the final connections to my main panel and worked closely with my building department throughout the process.”
The learning curve is steep but manageable when you respect the complexity involved. Solar installation combines carpentry, electrical work, and system design, each carrying real risks if done incorrectly. This guide breaks down every stage, from initial site assessment through final inspection, giving you the knowledge to either complete a safe installation yourself or confidently oversee professionals doing the work. Safety isn’t just a checklist item here; it’s the foundation of every decision you’ll make.
Before You Begin: Pre-Installation Essentials
Before any solar panel touches your roof, you need to navigate a critical phase that can make or break your installation: securing proper permissions and understanding your local requirements. Rushing into physical installation without completing these administrative steps can result in expensive fines, forced system removal, or insurance complications that far outweigh the time invested upfront.
Start by contacting your local building department to obtain the necessary permits. Most jurisdictions require a building permit for solar installations, and many also require electrical and structural permits. The application typically includes your system design plans, electrical diagrams, roof load calculations, and proof of homeowner’s insurance. Permit fees vary widely, from $100 in some rural areas to over $1,000 in certain cities, and processing times range from a few days to several weeks depending on your location’s workload and review complexity.
Next, notify your utility company about your planned installation. This interconnection application initiates the process for connecting your system to the grid and establishes net metering agreements where available. The utility will review your application to ensure your system won’t create grid stability issues and will determine what metering equipment you’ll need. This process can take anywhere from two weeks to three months, so submit your application early.
Conduct a thorough site assessment before finalizing your plans. Evaluate your roof’s condition, solar panels last 25-30 years, so if your roof needs replacement within the next decade, do it first. Check for adequate sun exposure by observing shade patterns throughout the day, particularly between 9 AM and 3 PM when solar production peaks. Measure your roof’s orientation and pitch; south-facing roofs with 15-40 degree slopes are ideal, but east and west orientations can still work effectively.
Understand your local building codes, which dictate setback requirements from roof edges, fire access pathways, and maximum system heights. Many jurisdictions require specific clearances around panels for firefighter access, and some homeowners associations impose aesthetic restrictions. Research these requirements thoroughly or consult with a solar professional familiar with your area’s regulations.
Plan for the required inspections, which typically occur at two stages: a rough inspection after mounting and wiring but before connecting to power, and a final inspection before the system goes live. Some municipalities require special and progress inspections at additional milestones. Only after passing final inspection and receiving Permission to Operate (PTO) from your utility can you legally energize your system.
Tools and Materials You’ll Need
Essential Safety Equipment
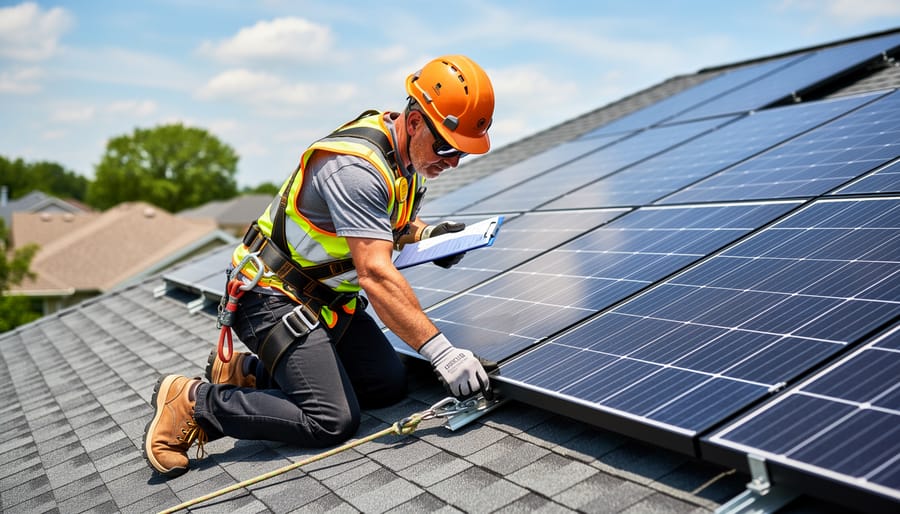
Working at heights while handling electrical components demands rigorous safety measures. Before starting any solar installation, assemble your protective equipment and verify everything is in proper working condition.
Your essential safety gear includes:
- Hard hat with chin strap to protect against falling objects and impacts during roof work
- OSHA-approved fall arrest harness with shock-absorbing lanyard rated for your weight plus tools
- Non-slip, rubber-soled work boots with ankle support for stable footing on angled surfaces
- Electrical-rated gloves (minimum Class 0 for DC systems) to prevent shock when handling wiring
- Safety glasses with side shields and UV protection for eye safety from debris and arc flash
- Roof brackets or anchors properly secured to structural members, not just roofing material
Your ladder must extend at least three feet above the roof edge and be secured at the top and bottom. For multi-story homes, consider renting scaffolding instead, it provides a more stable work platform and reduces fatigue during extended installation sessions.
Never work alone on a roof. Having a ground-level partner ensures someone can call for help if you fall or experience electrical shock. They can also hand up tools and materials, reducing your trips up and down the ladder.
Installation Tools and Materials
Installing solar panels requires specific hardware and components beyond basic tools. Here’s what you need to complete the installation, organized by category so you can gather everything before starting work.
Mounting Hardware and Racking Components
The foundation of your system starts with quality mounting equipment. You’ll need roof attachments appropriate for your roof type, lag bolts with flashing for asphalt shingles, specialized hooks for tile roofs, or ballasted mounts for flat roofs. Aluminum racking rails provide the framework that holds panels securely. Mid clamps and end clamps attach panels to the rails, while grounding clips ensure proper electrical safety. Most systems require stainless steel hardware to resist corrosion over decades of outdoor exposure.
Electrical Components and Wiring Materials
- MC4 connectors for weatherproof panel-to-panel connections
- PV wire rated for outdoor use, typically 10 AWG or 12 AWG depending on system size
- Electrical conduit (PVC or metal) to protect wiring runs
- Junction boxes for combining strings before they reach the inverter
- Grounding lugs, copper grounding wire, and grounding rods
- Circuit breakers sized for your system’s output
- AC and DC disconnect switches as required by code
Most electrical supply stores stock these items, though specialized solar distributors often offer complete kits that ensure component compatibility. Your inverter typically comes separately and should match your total panel wattage and voltage requirements.
Purchase 10-15% more wire and connectors than calculations suggest, having extras prevents mid-installation trips to the store when you discover a measurement was slightly off.
Safety First: Critical Precautions for Solar Installation
Solar panel installation involves working with high-voltage electricity and often operating at dangerous heights. These risks are real and demand your full attention to safety protocols before you touch a single panel or climb onto your roof.
Electrical Safety: Understanding DC Power Hazards
Solar panels generate direct current (DC) electricity whenever sunlight hits them, and unlike AC household current, you cannot simply flip a breaker to stop the flow. Even on cloudy days, panels produce voltage. Before any electrical work, cover panels completely with opaque tarps to eliminate power generation. Always use a multimeter to verify zero voltage before touching any wiring, and treat every wire as live until proven otherwise.
When working with DC connections, understand that arcing can occur more readily than with AC systems. Wear insulated gloves rated for electrical work, use tools with insulated handles, and never work on connections in wet conditions. The DC disconnect switch is your emergency stop, know where it is and how to use it before you start.
Fall Protection for Roof Work
Most solar installations happen on pitched roofs, where a fall can result in serious injury or death. Use a properly rated fall arrest system every time you are on the roof, not just when you feel the pitch is steep. This means a full-body harness, a secure anchor point that can support at least 5,000 pounds, and a shock-absorbing lanyard.
Inspect your ladder before each use. Position it at the correct angle (one foot out for every four feet up), secure the base, and extend it at least three feet above the roof edge. Never carry tools or materials while climbing. Use a rope and bucket to haul equipment up once you are safely positioned.
Work only in dry conditions. Morning dew, recent rain, or algae growth makes roof surfaces dangerously slippery. If conditions change while you are working, stop immediately and safely descend.
Weather and Environmental Conditions
Solar installation requires stable, predictable weather. Avoid working in wind speeds above 20 mph, as panels act like sails and can pull you off balance or become uncontrollable. Lightning, even distant storms, presents a deadly risk when you are the highest conductive point in the area. Check weather forecasts carefully and build in buffer time rather than rushing to beat incoming weather.
Temperature extremes also matter. On hot days, metal roofing and racking can cause burns, while panels themselves heat up significantly. Wear gloves and plan the most intensive work for cooler morning hours. In cold weather, fingers lose dexterity, making precision electrical work dangerous.
A Lesson From Experience
Mike Chen, a homeowner in Oregon who completed his own 6kW installation in 2025, shared how safety protocols prevented disaster. “I was three panels into mounting when I felt the roof surface shift slightly under my foot,” he recalls. “Because I was properly harnessed and tied off, when that section of older decking gave way, the fall arrest system caught me immediately. I had a bruise, but without that harness, I would have fallen 18 feet onto concrete. It was a wake-up call about not assuming older roofs are solid, and it proved that safety equipment works exactly when you need it most.”
His experience underscores a critical principle: safety gear only helps if you use it every time, not just when you think conditions are risky. The time to discover your roof has a weak spot is not when you are untethered and carrying a 40-pound panel.
Step-by-Step Solar Panel Installation Process
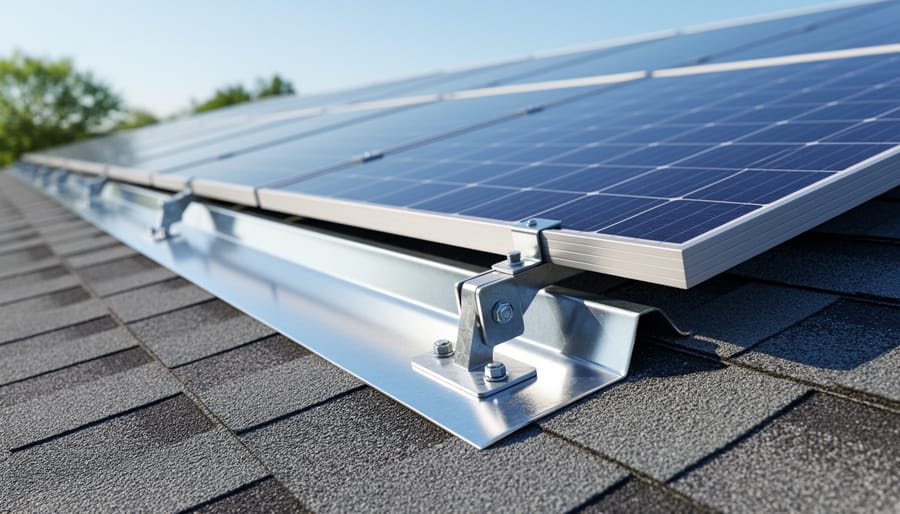
Step 1: Install the Mounting System
Installing the mounting system correctly is crucial, it’s the foundation that will hold your solar array in place for 25+ years. This step demands precision because any mistakes here can lead to roof leaks or structural failure down the line.
Start by locating your roof rafters using a stud finder from inside the attic or by measuring from a known reference point. Rafters typically sit 16 or 24 inches apart, and your mounting hardware must attach directly to them, never just to roof decking. Mark these locations clearly on the exterior roof surface with chalk or a crayon.
The installation sequence requires careful attention to waterproofing:
- Mark and drill pilot holes through the roofing material directly into the center of each rafter at predetermined mounting points
- Apply roof sealant generously around each hole, then install aluminum flashing beneath the shingles and over the mounting area to create a watertight barrier
- Bolt the mounting brackets or standoffs through the flashing into the rafters, ensuring each fastener is torqued to manufacturer specifications
- Seal around the bolts with additional weatherproof sealant, creating a complete seal that sheds water away from the penetration
- Attach the horizontal or vertical rails to the mounting brackets, checking alignment with a level, rails must be perfectly straight for panels to sit flush
Different roof types require specific approaches. Asphalt shingle roofs use the flashing method described above. Metal roofs often employ clamp-style mounts that attach to standing seams without penetrating the surface. Tile roofs require removing tiles, installing brackets, then replacing or cutting tiles to fit around the hardware. Flat roofs typically use ballasted systems where weight holds the array down without roof penetrations.
The waterproofing cannot be overstated. Every roof penetration is a potential leak point, so don’t rush this phase or skimp on sealant quality.
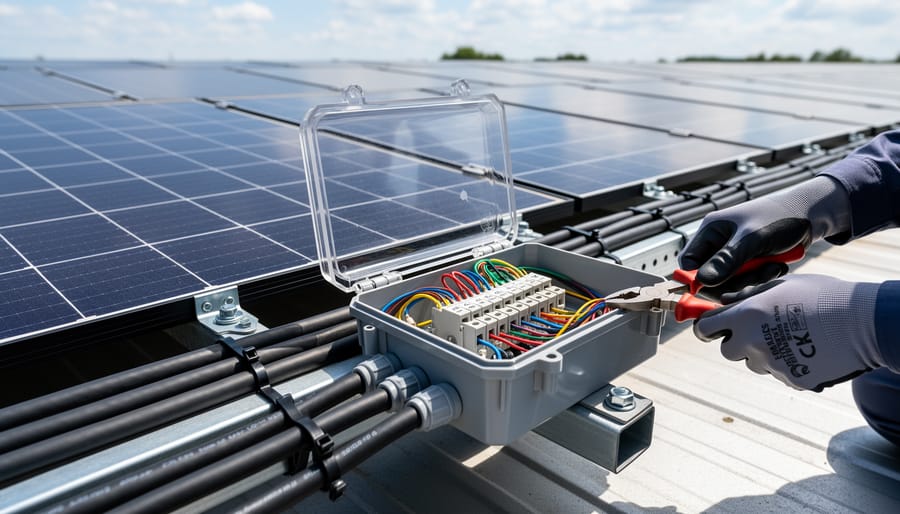
Step 2: Set Up the Electrical Wiring
Electrical wiring forms the nervous system of your solar array, and getting it right is non-negotiable for both safety and performance. Start by installing conduit from the mounting location down to your inverter, this protects wires from UV damage and physical wear. Use electrical metallic tubing (EMT) or PVC conduit rated for outdoor use, securing it with straps every four to six feet and ensuring weatherproof entry points at both ends.
Wire sizing depends on your system’s voltage and amperage. Most residential installations use 10 AWG or 12 AWG wire for string connections, but check your inverter specifications and local electrical codes. Undersized wire creates voltage drop and heat buildup, both serious fire hazards. Pull wires through the conduit using fish tape, leaving extra length at connections rather than cutting precisely, you can always trim excess, but short runs require complete replacement.
Use MC4 connectors for all panel-to-panel connections. These waterproof, locking connectors are industry standard and remarkably reliable when crimped or tightened properly. Invest in a proper MC4 crimping tool rather than using generic wire crimpers, which create weak connections prone to arcing.
Grounding cannot be overlooked. Run a grounding wire alongside your positive and negative conductors, bonding each panel frame and the racking system to create a continuous ground path. This protects against lightning strikes and electrical faults. Label all wires clearly at both ends, your future self will thank you during troubleshooting or system expansion.
Step 3: Mount the Solar Panels
With your mounting system installed and verified, you’re ready to attach the solar panels themselves. This step transforms your prepared roof into an active solar array, but precision matters, poorly secured panels can rattle loose in high winds or cause uneven electrical production.
Start by lifting panels onto the roof. Use at least two people for this job; solar panels are awkward to handle, typically 65-70 pounds each, and their glass surfaces are fragile at the edges. Position the first panel at the starting point of your array, usually the lower corner. Slide it onto the rails, leaving proper spacing between the rail edge and panel frame (typically 4-6 inches, but check your racking system specifications).
Secure the first panel using end clamps at the top and bottom rails. These clamps grip the panel’s long edges and bolt directly to the rail. Tighten bolts to the manufacturer’s torque specifications, over-tightening can crack panel frames, while under-tightening allows movement. Most systems require 8-10 foot-pounds of torque.
Place your second panel adjacent to the first, maintaining the specified gap between panels (usually ½ to 1 inch). This spacing accommodates thermal expansion, panels heat up in summer and contract in winter. Use mid-clamps where two panels meet; these single clamps secure both panel edges simultaneously. Continue this pattern across each row.
Check panel alignment frequently using a level. Panels should sit flat against the rails without twisting or gaps underneath. Verify they’re square to each other, misaligned panels look unprofessional and may indicate racking problems. Before final tightening, confirm your array matches the planned layout for proper electrical stringing in the next step.
Step 4: Wire the Solar Panels
With your panels securely mounted, it’s time to establish the electrical connections that transform individual panels into a functioning array. This step determines your system’s voltage and amperage output, making proper configuration essential.
Series vs. Parallel Connections
Series wiring connects the positive terminal of one panel to the negative terminal of the next, increasing voltage while maintaining amperage. A series string of four 300-watt panels at 40 volts each produces 160 volts at the original amperage. Parallel wiring connects all positive terminals together and all negative terminals together, maintaining voltage while adding amperage. Most residential systems use series strings of 8-12 panels connected to string inverters, though microinverter systems wire panels in parallel.
Making Waterproof Connections
Solar panels use MC4 connectors, industry-standard waterproof plugs that click together securely. Match positive to negative terminals between panels, pushing connectors firmly until you hear a distinct click. Never force mismatched connectors or leave connections partially seated. Once clicked, MC4 connectors require a special tool to disconnect, ensuring they won’t separate from wind or vibration.
Cable Management
Secure cables to the racking system using UV-resistant zip ties every 12-18 inches, leaving slight slack for thermal expansion. Route cables along the underside of rails to protect them from weather and prevent tripping hazards. Keep DC cables separated from AC wiring, and ensure no cables contact sharp metal edges that could eventually wear through insulation.
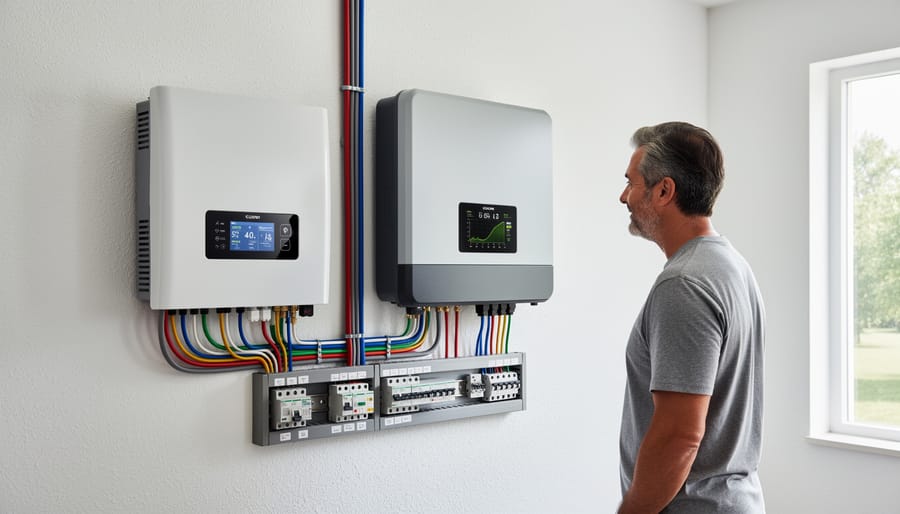
Step 5: Install the Inverter
The inverter converts your panels’ DC electricity into usable AC power, so its placement directly affects performance and longevity. String inverters need a cool, shaded location with excellent airflow, garages, basements, or north-facing exterior walls work well. Never install in direct sunlight or enclosed spaces where heat builds up. Mount at eye level for easy monitoring and maintenance access, leaving at least 12 inches of clearance on all sides for ventilation.
Use the manufacturer’s mounting bracket to secure the inverter to a solid wall surface, ensuring it’s level. If installing outdoors, verify the unit’s NEMA rating matches your climate exposure. For microinverters, you’ve already completed this step during panel mounting, as they attach directly to each panel’s racking system.
Make initial DC connections from your solar array to the inverter’s input terminals, following color coding strictly, positive to positive, negative to negative. Torque connections to specifications using a calibrated wrench. Install the required DC disconnect switch between panels and inverter per code. Do not energize the system yet; AC connections to your electrical panel come next and typically require a licensed electrician to ensure compliance and safety.
Step 6: Connect the System to Your Home
Connecting your solar system to your home’s electrical infrastructure is the most complex and potentially dangerous phase of installation. This is where DC power from your panels meets the AC grid that powers your appliances, making precision and code compliance absolutely critical.
Start by mounting the main disconnect switch between your inverter and electrical panel. This emergency shutoff allows first responders or electricians to quickly isolate the solar system from your home. Most jurisdictions require this disconnect to be clearly labeled and accessible from outside your home, meeting specific grid-tied permitting requirements that vary by location.
Next, a dedicated circuit breaker gets installed in your main electrical panel to connect the inverter output. This breaker must match your inverter’s output specifications and be positioned according to the “120 percent rule” that limits total current on the panel’s bus bar. Many installers place this breaker at the opposite end from the main breaker to balance electrical loads.
If you’re adding battery storage, the inverter connects to the battery system before feeding into your electrical panel, allowing excess solar energy to charge the batteries. This integration requires additional disconnects and charge controllers, significantly increasing complexity.
Finally, wire your monitoring system according to manufacturer instructions, typically through WiFi or ethernet connection to your router. This enables real-time tracking of energy production and system health.
Critical note: Unless you’re a licensed electrician familiar with solar installations, hire a qualified professional for this step. Working inside energized electrical panels carries serious injury and fire risks, and improper connections void equipment warranties and create long-term safety hazards for your household.
Testing and Verification: Ensuring Your System Works Properly
Before you flip the switch and start generating solar power, thorough testing ensures your installation is safe, code-compliant, and ready to perform for decades. This verification phase catches potential issues now rather than after your system goes live or during the official inspection.
Start with a comprehensive visual inspection of the entire installation:
- Check all mounting hardware is tight and properly torqued, loose bolts can lead to panel movement and roof damage
- Verify flashing around all roof penetrations is properly sealed with no gaps where water could enter
- Inspect panel surfaces for cracks, chips, or damage that occurred during installation
- Confirm all wiring is properly secured with no exposed conductors or loose connections
- Examine MC4 connectors to ensure they’re fully seated and weather-sealed
- Verify the inverter is mounted securely with adequate clearance for ventilation
- Check that grounding wires are connected at every required point and properly sized
- Ensure all labels are in place, including DC disconnect warnings and system voltage markings
Walk the roof carefully to confirm panels don’t shift or rock when gently pressed. Any movement indicates mounting problems that must be corrected.
For electrical testing, use a multimeter to verify voltage and polarity at each string before connecting to the inverter. Measure open-circuit voltage on sunny days, readings should match manufacturer specifications for your panel configuration. Test continuity on all ground connections using a megohmmeter to confirm resistance meets code requirements, typically less than 25 ohms to earth.
Once electrical tests pass, perform system commissioning by powering up the inverter according to manufacturer instructions. Modern inverters run self-diagnostics and display error codes if they detect problems. Monitor the initial startup sequence to confirm the system recognizes all panels and begins producing power as expected.
Document everything with photos and test results. Inspectors appreciate thorough records, and this documentation proves valuable for warranty claims or future troubleshooting. Many jurisdictions require you to submit commissioning data before the official inspection, so keep detailed notes of all voltage readings, ground resistance measurements, and inverter settings.
Final Inspection and Grid Connection
Your solar installation is complete, but there’s one final hurdle before you can flip the switch: passing inspection and getting grid approval.
The municipal inspection typically occurs within 5-10 business days of your request. An electrical inspector will verify that your installation meets National Electrical Code (NEC) standards and local building codes. They’ll check grounding connections, wire sizing, proper labeling, conduit installation, and inverter placement. Roof penetrations get scrutinized for proper flashing and waterproofing. Your disconnect switches must be clearly labeled and easily accessible.
“Most inspection failures I see are simple oversights,” explains Marcus Chen, a certified electrical inspector in California with 12 years of solar inspection experience. “Missing labels on the rapid shutdown system, improper wire management in the attic, or using residential-grade wire where code requires something different. The installations that sail through are the ones where someone double-checked every connection and actually read the code requirements for their jurisdiction.”
Common failure points include inadequate grounding, missing anti-islanding protection documentation, incorrect breaker sizing in your main panel, and incomplete permit paperwork. Review your local amendment to the NEC before the inspector arrives, some municipalities have specific requirements that differ from the national standard.
Once you pass inspection, you’ll submit the approval to your utility company for interconnection. This process involves installing a bi-directional meter and signing an interconnection agreement. The utility’s timeline varies significantly by region, some approve within days, others take 4-8 weeks. You’ll receive Permission to Operate (PTO), the official green light to activate your system.
Until you have PTO in hand, keep your system switched off. Operating without authorization can void warranties and create liability issues.
Common Installation Mistakes and How to Avoid Them
Even experienced DIYers can make costly errors during solar panel installation, and some mistakes create safety hazards or void warranties. Understanding these common pitfalls helps you either avoid them yourself or recognize red flags when hiring contractors.
Improper Flashing and Roof Penetrations
The most frequent and damaging mistake is inadequate waterproofing around mounting penetrations. When installers rush through flashing installation or use incorrect materials, water eventually finds its way beneath shingles, causing rot, mold, and interior damage that may not appear for months or years. Always use proper solar flashing kits designed for your roof type, apply generous amounts of roofing sealant, and slide flashing under the shingle above each penetration point. Test your work with a hose before proceeding, discovering a leak during installation costs nothing compared to repairing water damage later.
Incorrect Wire Sizing and Poor Cable Management
Undersized wires create voltage drop that reduces system efficiency and generates dangerous heat that can start fires. Calculate wire gauge based on your system’s amperage and the distance from panels to inverter, then go one size larger than the minimum requirement. Secure all cables properly with UV-resistant zip ties, use appropriate conduit for exposed runs, and leave service loops at connections to prevent strain. Loose or poorly routed cables get damaged by wind, create tripping hazards, and fail inspections.
Inadequate Grounding
Proper grounding protects your home from lightning strikes and electrical faults, yet it’s often rushed or misunderstood. Every panel frame, mounting rail, and metal component must have continuous grounding back to your main electrical panel. Use grounding lugs rated for solar applications, make clean metal-to-metal connections (remove paint or coatings), and follow NEC requirements for grounding electrode systems. A lightning strike to an improperly grounded array can destroy your inverter, damage household electronics, and create fire risk.
Skipping Permits or Inspections
Some installers skip permits to save time and fees, but this decision backfires spectacularly. Unpermitted work violates building codes, voids equipment warranties, creates liability issues if something goes wrong, and prevents you from receiving solar incentives or net metering credits. When you eventually sell your home, buyers’ inspectors will flag the unpermitted system, forcing expensive retrofits or system removal. Always obtain proper permits before starting work, the process typically adds only one to three weeks and costs a few hundred dollars, protecting your investment of tens of thousands.
Frequently Asked Questions
How long does it take to install solar panels?
A professional crew typically completes the physical installation in one to three days for a residential system, depending on system size and roof complexity. However, the entire process from permit application to grid connection often takes two to four months due to inspections, utility approvals, and scheduling.
Is DIY solar installation really cheaper than hiring professionals?
While DIY installation can save $5,000 to $10,000 in labor costs, you’ll lose access to bulk equipment pricing that installers receive, potentially face higher insurance rates, and might forfeit manufacturer warranties that require professional installation. Many homeowners find the savings don’t justify the risks and time investment, especially when considering that mistakes can be expensive to fix.
Will installing solar panels damage my roof?
Proper installation shouldn’t damage your roof and can actually protect the covered areas from weather exposure. The key is correct flashing installation around mounting points to prevent leaks, this is where many DIY installations fail. Professional installers carry insurance to cover any damage during installation.
Does the season matter for solar panel installation?
Installation is possible year-round, but spring and fall offer ideal conditions with moderate temperatures and lower risk of weather delays. Summer heat makes rooftop work more challenging, while winter snow and ice create safety hazards and can extend project timelines.
How long will my solar panel system last?
Quality solar panels typically carry 25-year performance warranties and often continue producing electricity for 30 to 40 years, though at gradually reduced efficiency. Inverters generally need replacement after 10 to 15 years, which should be factored into your long-term cost calculations.
Can I add more panels to my system later?
Expansion is possible if you plan ahead by installing an inverter with adequate capacity and leaving space in your electrical panel. However, adding panels later often costs more per watt than installing a larger system initially, and you may need to go through the permitting process again.
What happens to my warranty if I install the panels myself?
Many panel manufacturers require professional installation to honor their warranties, and you won’t have access to workmanship warranties that cover installation errors. Check warranty terms carefully before committing to DIY, you could void coverage worth thousands of dollars.
These questions reflect the concerns homeowners raise most often when considering solar installation. The answers reveal an important pattern: while DIY installation is technically possible in many jurisdictions, the financial savings often disappear when you account for equipment costs, potential warranty issues, and the risk of costly mistakes. That doesn’t mean you shouldn’t understand the process thoroughly. Even if you hire professionals, knowing what quality installation looks like helps you ask the right questions, catch potential problems during work, and maintain your system properly afterward.
Understanding installation timelines also helps set realistic expectations. The actual panel mounting might happen in a day or two, but navigating permits and utility approvals requires patience. Starting the process well before you want your system operational prevents frustration and allows you to make thoughtful decisions rather than rushing through critical choices.
Understanding how solar panels are installed, from mounting systems to electrical connections, puts you in control of one of the most significant home improvements you’ll make. Whether you ultimately hire professionals or tackle portions of the work yourself, you now know what quality installation looks like, which questions to ask contractors, and how to verify that the job is done right.
Your next step depends on your comfort level and local regulations. If you’re proceeding with DIY installation, start by applying for permits and scheduling your pre-installation inspection. If you’re hiring professionals, use your newfound knowledge to evaluate quotes critically, understand timelines, and ensure contractors follow proper safety and code compliance procedures. Either path leads to the same destination: clean, renewable energy powering your home for decades to come.
Solar Energy Power offers extensive resources to support your journey beyond installation. You’ll find guides on system maintenance, detailed cost breakdowns for various system sizes, and comparisons to help you choose the right panels and inverters for your specific needs. Bookmark these resources as you move from planning to action.
Joining the solar energy movement in 2026 means more than reducing your electricity bills. You’re taking tangible steps toward energy independence, contributing to a cleaner grid, and demonstrating that sustainable living is both practical and achievable. The installation process may seem complex at first, but thousands of homeowners complete it successfully every year. You’re ready to be one of them.